Ultimate Nachos

I hope everyone had a great holiday weekend! I did, although I swear this weekend went by in the blink of an eye…. and isn’t the first day back to work after a long weekend the worst?!?! I felt like I was tired and just dragging all day long. Hopefully tomorrow my brain will be working better 🙂

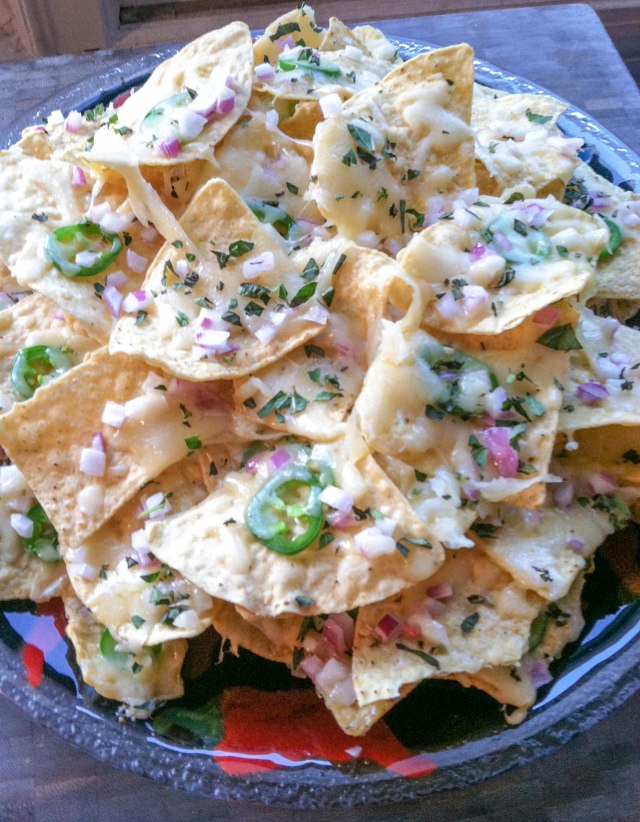
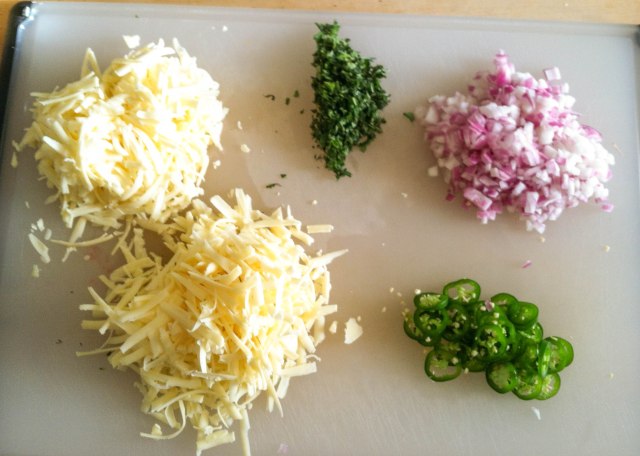
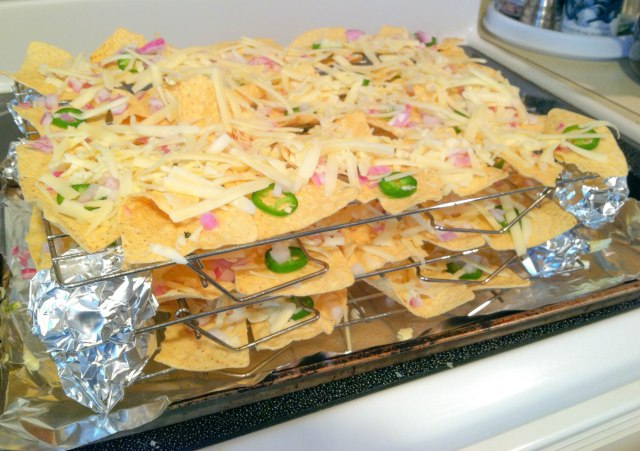
I made these nachos for Cinco de Mayo this year. They are one of our favorite appetizers (and I will admit that we sometimes make a meal of them). I’ve made them for Super Bowl Sunday, and Ron has requested them for his birthday. They are my most favorite nacho recipe, and while they are pretty minimal, they are fantastic. The method of making them may seem a little fussy, but this guarantees even coverage of all the toppings on every chip. I love the spiciness of the jalapenos, but if you’d like to tone it down a bit you can remove the seeds and place a jalapeno on every other nacho instead of all of them. I really love loaded nachos too (and should really make some soon- maybe this recipe or this one), but I think this particular recipe will always be my favorite.

Ultimate Nachos

Ultimate Nachos

Ultimate Nachos

Ultimate Nachos

Makes about 6 servings (or less if you are like me!)

Ingredients:

80 tortilla chips

3-4 jalapenos, thinly sliced (you can remove the seeds if you’d like these milder)

4 1/2 ounces (about 1 cup) red onion, diced

6 oz (about 2 1/4 cups) cheddar cheese, finely grated

6 oz (about 2 1/4 cups) Monterey Jack cheese, finely grated (you can substitute Oaxaca cheese if you can find it)

2 Tbsp fresh oregano, finely chopped

Optional for serving:

Salsa

Guacamole

Sour Cream

Directions:

1. Preheat the oven to 350 degrees, and set one oven rack on the lowest setting, and the other on the highest.

2. Line a baking sheet with foil. Make 8 balls of tinfoil. Take 3 cooling racks, and spray them with nonstick cooking spray. Place one of the racks on the prepared baking sheet, and place a ball of aluminum foil in each corner (this will support the next cooling rack as you will be laying it on top of the aluminum foil balls.

3. Place 1/3 of the chips in a single layer on the cooling rack. Place a jalapeno slice on each chip. (Or every other chip to decrease spice level). Sprinkle 1/3 of the red onions over the chips,1/3 of the cheddar cheese, and 1/3 of the Monterey jack cheese. Place the second cooling rack on top of the aluminum foil balls, place the remaining balls in the corners, and repeat with the next third of the chips, jalapenos, and toppings. Lay the remaining cooling rack on top, and finish with the remaining chips and toppings.

4. Place in oven, and bake for 7 minutes. Remove from oven, and sprinkle nachos evenly with oregano. Serve with desired condiments.

Source: Alton Brown

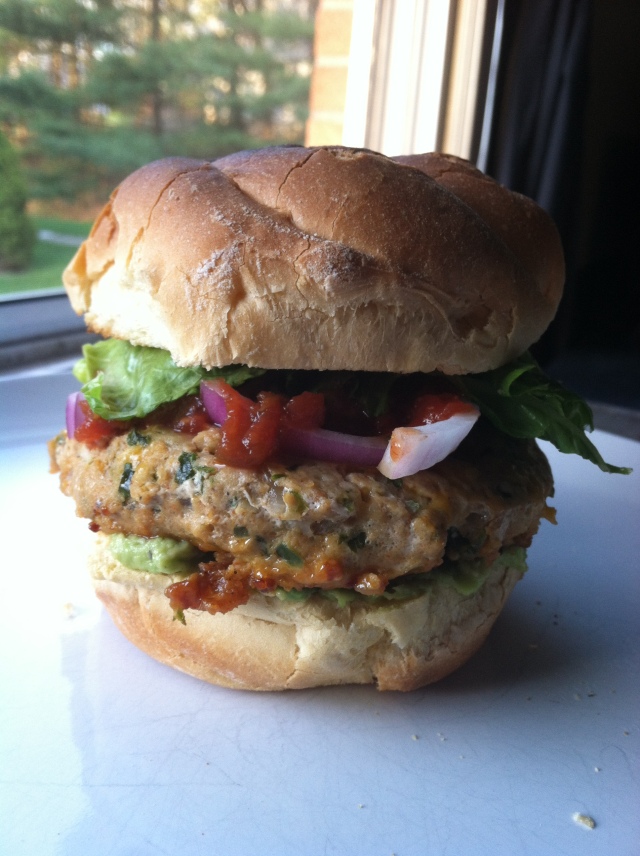
Cheddar-Jalapeno Chicken Burgers with Guacamole

Cheddar-Jalapeno Chicken Burgers with Guacamole

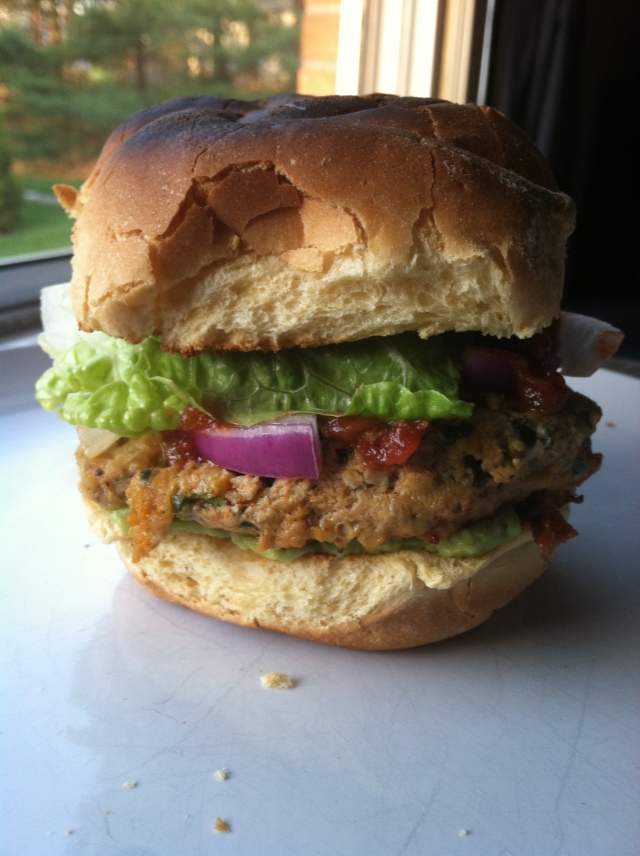
I really love a good burger recipe, and I love experimenting with new combinations of toppings/flavor profiles. I am a big fan of classic burgers (Five Guys makes one of my favorite burgers), but when I come across an interesting-looking burger recipe it’s pretty much guaranteed that I’ll try it at some point. So far on this blog I have recipes for turkey burgers with cheddar and smokey aioli, jalapeno popper sliders, chipotle turkey burgers, Good Stuff melts, and taco pockets… and I can only see more recipes for burgers appearing here in the future. It’s just one of those foods that’s endlessly adaptable, and soooo delicious! I really would love to try making some vegetarian/vegan burgers as well! (Actually- the black bean-brown rice patties could be classified as a burger- those were awesome!) When I came across this recipe on What’s Gaby Cooking, I knew I would be making it soon- it has some of my favorite things right in the title- cheddar, jalapenos and guacamole. These made a very flavorful burger, with all the spices, and the cheddar, onion and jalapeno being added to the patty itself. This helps keep the burgers from drying out, as chicken is a very lean meat. The toppings that are added (all customizable of course), just make it that much better!

Cheddar-Jalapeno Chicken Burgers with Guacamole

Cheddar-Jalapeno Chicken Burgers with Guacamole

Cheddar-Jalapeno Chicken Burgers with Guacamole

Cheddar-Jalapeno Chicken Burgers with Guacamole

Serves 4

Ingredients:

1 lb ground chicken

1/2 cup yellow onion, finely chopped

1/4 cup fresh cilantro, finely chopped

2 garlic cloves, finely chopped

2 tsp jalapeno, finely chopped

1 tsp ground cumin

1 tsp paprika

1/4 cup cheddar cheese, finely shredded

Salt and freshly ground pepper

4 hamburger buns

Optional Toppings

Guacamole

Sour cream

red onion slices

lettuce

tomato

Salsa

Directions:

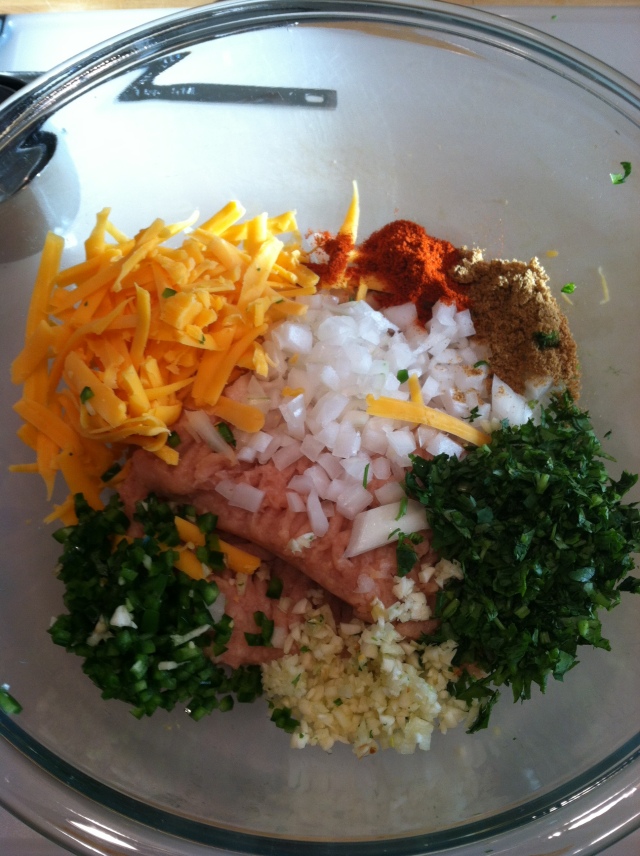
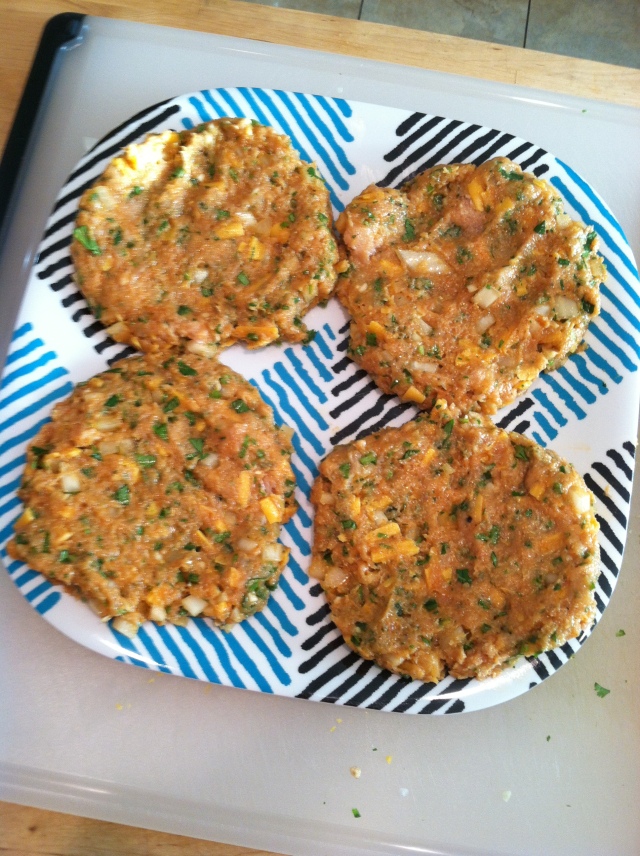
1. Add the chicken to a large bowl. Add the onion, cilantro, garlic, jalapeno, cumin, paprika, cheddar cheese, salt and pepper. Combine gently with hands. Form 4 patties.

2. Heat a grill pan, or large skillet on medium heat. Spray with a nonstick cooking spray, or add a little bit of oil and swirl so it coats the pan. Add the patties, and cook about 5-7 minutes per side.

3. Serve on a bun with any desired toppings.

Source: What’s Gaby Cooking

Pasta with Mushroom-Sausage Ragu

It’s hard to know what to say on a day like today when such a terrible event has occurred. I’ll just say that my thoughts and prayers are with the people of Boston, and their loved ones.  It’s hard to think of much other than Boston at a time like this, but I still wanted to share a recipe with you tonight, as I feel like there needs to be a sense of normalcy to provide comfort and peace, at least for me.

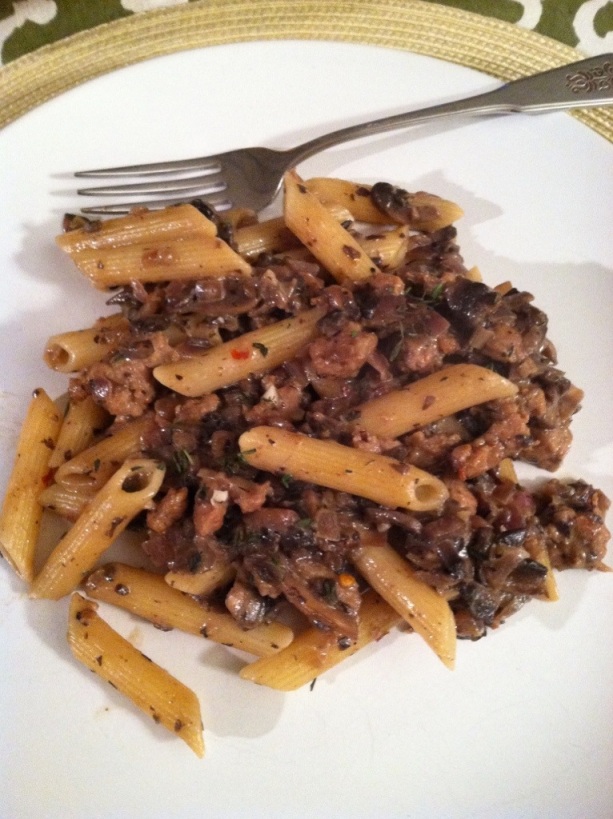
This recipe is a very comforting, and fairly healthy one. The mushrooms and onions, combined with the turkey sausage make a wonderfully hearty, but light topping for the pasta. Ron and I both loved this one.

20130415-104420.jpg

Pasta with Mushroom-Sausage Ragu

Serves 4

Ingredients:

8 oz pasta (a short shape such as penne, ziti, or shells)

1 cup plus 1 Tbsp 2% milk, divided

1 tsp cornstarch or arrowroot powder

2 Tbsp olive oil, divided

8 oz. button mushrooms, sliced

6 oz. portobello mushrooms, chopped

1 medium red onion, chopped

3 cloves garlic, chopped

1/4 tsp sea salt, plus more to taste

1/2 tsp freshly ground black pepper, plus more to taste

8 oz. Italian turkey sausage, hot or mild, removed from casings

1 Tbsp tomato paste

1 Tbsp fresh thyme leaves, divided

1/4 cup Parmesan cheese, grated

red pepper flakes, to taste (optional)

Directions:

1. Over high heat, bring a pot of salted water to a boil. Add pasta, and cook until al dente.

2. Combine the cornstarch (or arrowroot powder) with 1 Tbsp of the milk in a small bowl. Set aside.

3. While the pasta is cooking, place a large skillet over medium-high heat, and add 1 Tbsp of olive oil. Add the mushrooms and onions and cook about 9-11 minutes, until the liquid has evaporated, and the mushroom-onion mixture is lightly browned. Add the garlic, salt and pepper, and cook a minute more. Remove the mixture from the pan, and place in a bowl. Set aside.

4. Place skillet back on the stove, and add the remaining Tbsp of olive oil. Add the turkey sausage, and cook, breaking up the sausage, until cooked through, about 3-5 minutes.

5. To the sausage, add a cup of milk and the tomato paste, and bring to a simmer. Reduce the heat to medium low, add the cornstarch slurry, and cook about a minute until slightly thickened, stirring constantly. Add back the mushroom mixture, and 2 tsp of fresh thyme. Taste, and add salt and pepper to taste, and red pepper flakes if desired.

6. Serve over the pasta, or do as I did, and mix together with the pasta. Sprinkle the remaining thyme over the top.

Source: Apple a Day (who adapted it from Clean Eating, March 2013)


Buffalo Chicken Salad with Avocado Ranch Dressing

Buffalo chicken has to be one of my favorite foods ever…. and of course it’s one of my boyfriend’s favorites! I love it in pretty much any incarnation, whether it be the classic buffalo chicken wings, or a twist on the classic, such as a topping on a pizza, inside egg rolls, in potato skins, etc. If it has buffalo chicken in the title, it can pretty much be guaranteed that I’ll try it.  When this recipe popped up on Smells Like Home a month ago, I immediately put it at the top of my “make after this detox” list. Ron was all for it because even though it’s a healthy salad, buffalo chicken makes everything exciting!

The buffalo chicken in this recipe is baked, which cuts the guilt down even further. It’s breaded in a toasted panko breadcrumb coating, and baked on a wire rack, which ensures that the chicken will stay crispy, rather than soggy.  The creamy avocado ranch dressing is a perfect accompaniment to the salad, although if you wanted, you could certainly serve it with a regular ranch or blue cheese dressing. I will most definitely be making this regularly. Ron has already requested a repeat of this meal, and I will be fulfilling that request soon.

Buffalo Chicken Salad
Serves 2-4 (Depending on how hungry you are!)

Ingredients:
1 recipe buffalo chicken (recipe follows)
Avocado ranch dressing (recipe follows)
Lettuce
Cherry or grape tomatoes
Blue, feta or cheddar cheese
Crumbled bacon(optional)
Scallions or red onions (optional)
Celery (optional)

Directions:
1. Assemble individual salads. Place buffalo chicken on top. Drizzle dressing over salad.

Buffalo Chicken
Ingredients:
2 cups panko breadcrumbs
2 Tbsp canola oil
1/2 cup all-purpose flour
1 tsp garlic powder
1/2 tsp kosher salt
1/4 tsp cayenne pepper (optional)
3 large egg whites
1 Tbsp water
1 Tbsp Dijon or whole grain mustard
1 tsp minced fresh thyme or 1/4 tsp dried thyme
Cooking spray
1 lb chicken tenderloins ( or boneless skinless chicken breasts cut into 3/4-inch strips
1 cup buffalo wing sauce (I used Frank’s Red Hot Original)
3 Tbsp salted butter

Directions:
1. Preheat oven to 475 degrees. Line a baking sheet with tinfoil, and place a wire rack on the sheet. Spray with nonstick cooking spray.
2. Place a large skillet over medium-high heat, and add canola oil and breadcrumbs. Toss together and stir until the breadcrumbs are golden brown, about 8-10 minutes. Place in a shallow dish or pie plate when toasted.
3. In a second dish or pie plate, stir together the flour, garlic, salt and cayenne pepper, if using. In a medium bowl, whisk together the egg whites, water, mustard and thyme.
4. To prepare chicken, dredge each piece in the flour mixture, then the egg whites, then the breadcrumbs. Place on the prepared wire rack on the baking sheet. When all the chicken is coated, spray the tops with nonstick cooking spray. (I highly recommend getting an oil mister- that way you can use your own oil, without all the other ingredients that the cooking spray usually contains.)
5. Place the chicken in the oven and make for 10-12 minutes, until the chicken is cooked through, and the coating is golden brown.
6. While the chicken cooks, place the butter and the wing sauce in a microwave safe bowl and microwave in 30-second increments until the butter is melted. Whisk together to combine.
7. When chicken is cooked, dredge each piece carefully in the buffalo sauce to coat.

Avocado Ranch Dressing

Ingredients:
1/2 avocado, removed from skin and diced
1/3 cup mayonnaise
1/3 cup sour cream
2 tsp olive oil
1 1/2 tsp lemon juice
Up to 1/2 cup buttermilk
1 small bunch of chives, or 1 scallion, roughly chopped
2 Tbsp parsley, chopped
1 small clove garlic, minced
1/4 tsp sea salt
Freshly ground black pepper

Directions:
1. Place avocado, mayonnaise, sour cream, olive oil, lemon juice, 1/4 cup buttermilk, chives (or scallions), parsley, garlic, salt and pepper to taste, in a blender. Blend for about 10 seconds. Scrape down side, add more buttermilk if desired to change consistency, and blend until completely smooth. Season with salt and pepper to taste.

Source: Smells Like Home

Buffalo Chicken Previously: Buffalo Chicken Melts

Here are some other buffalo chicken recipes from around the web that I’d love to try!
Buffalo Chicken Monkey Bread (Confections of a Foodie Bride)
Buffalo Chicken Bites (Tracey’s Culinary Adventures)
Buffalo Chicken Egg Rolls (Smells Like Home)
Buffalo Chicken Sliders (Country Cleaver)
30-Minute Buffalo Chicken French Breads (How Sweet It Is)

Black Bean-Brown Rice Patties

Happy weekend everyone! I hope spring has started well for you all.  It’s still quite cold here in CT and it’ll be a few weeks more before we actually start feeling any spring-like weather, but for now I’m enjoying the lengthening of days and searching for signs of buds and shoots pushing up from the earth. It looks like we possibly might have snow on Monday, and honesty, that doesn’t bother me at all. That’s just one of the things I expect from living in New England. The snow this winter has not burnt me out yet! 
These patties are a wonderful light, but hearty meal, that are one of my top contenders for my favorite recipe of the cleanse. I served mine with romaine lettuce drizzled with olive oil and lime juice, with some buttery avocado and cilantro on top. I didn’t even miss having a bun for these patties. The only issue was that they were a bit dry, so maybe next time I’d add a little bit more oil, or possibly bake them a bit less.  Regardless of this though, they were fabulous!


Black Bean-Brown Rice Patties

Makes 6 Patties (Serves 2-3)

Ingredients:
1 15-oz can black beans, rinsed and drained
1 3/4 cup cooked brown rice (For reference, 1/2 cup uncooked rice will yield about 1 1/2 cups cooked rice)
2 scallions, chopped
2 cloves garlic, chopped
1 jalapeno, stemmed, seeded and chopped
1 Tbsp flaxmeal
1 tsp ground cumin
2 Tbsp extra-virgin olive oil, plus more for drizzling
Coarse salt
Directions
1. Preheat oven to 425 degrees. Line a baking sheet with parchment paper.
2. Add all ingredients to food processor, and pulse until combined. Season to taste with salt.
3. Form 6 patties, about 1-inch thick. Place patties on prepared baking sheet. Drizzle with olive oil. Bake about 20-minutes, until the tops are crisp and golden.
You can serve these plain if you’d like, but they are fabulous with a few extras- some ideas: lettuce, tomatoes, avocado, red onion, cilantro. Drizzle with a little olive oil and a squeeze of lime.

Roasted Beets on Greens

My mom always says that when I was a baby I LOVED beets. I have to laugh when I think about how much of a mess I must have made trying to eat beets- the stains that must have resulted from that! Nowadays I still love beets, but it is so rare that I actually eat them.

Ron is so picky about vegetables that I pretty much stick to those he’ll eat- lettuce, peppers, onions, cucumbers, mushrooms (I know- not technically a vegetable)… This is another reason that I’ve been enjoying this detox- I actually have a reason to buy vegetables I don’t usually purchase, and it has also allowed me to make some things for myself that I wouldn’t ordinarily have made, as I try to cook things that Ron will eat as well. This has allowed me to discover some really great recipes, and also has inspired me to seek out more variation in meals (such as lunch) that I am only cooking for myself.

These roasted beets on green were great! At first glance I did not think this recipe would satisfy me, but the amount of food is deceptive. I also was a little leery of using the fennel seeds and caraway seeds in the vinaigrette as they are not (or at least I thought they weren’t) my favorite flavors, but I ended up loving the flavors in this. I had this as a lunch the first week of the detox, but it could also work as a side dish to a more substantial main dish if you cut down the portions.


Roasted Beets on Greens
Serves 4 (as a main)

Ingredients:
2 bunches beets, trimmed
3 Tbsp extra-virgin olive oil
Juice of 1 lemon
2 tsp honey
1 clove garlic, minced
1 tsp fennel seeds
1 tsp caraway seeds
Coarse salt and freshly ground black pepper
4 cups baby spinach, divided
1 cup fresh parsley leaves, divided
Thinly sliced red onion

Directions:
1. Preheat oven to 400 degrees. Wrap beet in tinfoil, and roast for about an hour, until tender. Remove from oven, let cool, and then peel the beets and dice them.
2. In a medium bowl, whisk together the olive oil, lemon juice, honey, garlic, fennel, and caraway seeds. Season to taste with salt and pepper. Add the beets to the bowl, and toss together.
3. To serve, toss each serving of beets with 1 cup of baby spinach and 1/4 cup of parsley. Season to taste with salt and pepper. Top with slices of red onion.

Source: Whole Living, January/February 2013

Cauliflower "Rice" Stir-Fry

Wow! I really didn’t mean to go so long without posting! Time is speeding by, and I just can’t keep up with it. How is it already March?!  Soon buds will be sprouting on the trees, flowers will be blooming, I’ll be able to open the windows in my apartment, and I’ll be able to go outside without a coat. It’s insane how time is speeding by.

Anyway…. As I mentioned in one of my last posts, my best friend and I decided to do the Whole Living Cleanse as a healthy living challenge and we are currently about 2/3 into it! It’s been hard at times (the beginning especially), but really good! I’m definitely feeling healthier and have even dropped a few pounds! The cleanse has you omit certain things from your diet- dairy, gluten, meat, processed foods, added sugar, alcohol and coffee. The things I’m struggling the most with are not drinking coffee, and my cravings for salty things and carbs. I really haven’t been craving sugar at all, and I’m doing fine without the meat and dairy. This cleanse has made me realize just how much mindless snacking I do in my everyday life- I realize that I just reach for a handful of this here, and a handful of that there and it really adds up, so I think this cleanse has been great as it has made me be mindful of what enters my body. I can definitely see myself keeping up with this way of eating in some capacity when it is finished. Limiting my intake of processed foods and added sugars especially. I will definitely be getting a cup of coffee as soon as this is done however- I think the research on the benefits of coffee supports me on that too 🙂

So doing this cleanse has definitely been not quite as hard as it could be due to the mostly delicious recipes it has encompassed. I wanted to share some of my favorites here, but go to the website for the remainder!!  My favorite of the first week was this cauliflower “rice” stir-fry. I loved using the cauliflower as a rice substiiute! I’ve seen this done, but have never tried it myself. Of course it doesn’t taste quite like rice, but it is super delicious and if you looking at lowering your carb intake, this is a great way to do it.

Cauliflower “Rice” Stir-Fry
Serves 2

Ingredients:
2 cups cauliflower florets
2 Tbsp coconut or extra-virgin olive oil, divided
1 sliced red onion, divided
4 cloves garlic, minced, divided
Coarse salt
1/4 cup cleansing broth, or vegetable broth
1 Tbsp fresh ginger, minced
1 small red chile, thinly sliced
2 cups broccoli florets
1 large carrot, julienned
1/2 red bell pepper, stemmed, seeded, and diced
Juice of 1/2 lemon
2 Tbsp shelled pumpkin seeds
2 Tbsp fresh cilantro leaves

Directions:
1. In a food processor pulse cauliflower florets until finely chopped.
2. In a large skillet, heat one Tbsp of oil over medium heat. Add half of the onion and half of the garlic, and cook about 6 minutes, until tender, stirring frequently. Add cauliflower. Season with salt. Add broth, and place cover on pan. Steam about 6 minutes until the cauliflower is tender, and the broth has evaporated. Remove to a bowl and cover to keep warm.
3. Wipe out pan, and add remaining oil. Increase the heat to medium-high. Add remaining onion, and cook about 5 minutes until tender. Add remaining garlic, ginger, and chile, and cook for 1 minute. Add the broccoli, carrot and red pepper, and cook about 5 minutes, until tender, stirring occasionally. Season to taste with salt.
4. Remove from heat and add lemon juice.
5. When serving, sprinkle pumpkin seeds and cilantro on top of the stir-fry.

Source: Whole Living, January/February 2013

Grilled Pizza

Hey guys, long time no see!!!   I’m so sorry for the lack of posting recently.  It’s not that I haven’t been cooking, I definitely have, but I guess I’ve been lacking the drive to sit at the computer.  I’m going to blame the heat the last few weeks… easy excuse, right?  Anyway, I thought that tonight I’d post one of the delicious recipes I’ve made lately from my new favorite cookbook- Gourmet Today.  I’ve found so many great recipes so far, and I’m dying to make many many more.  There are seriously hundreds of recipes that jumped out at me when I read through the cookbook.  I am going on vacation tomorrow, down to Virginia, but when I get back I am hoping that my relaxing vacation reinspires me to jump back into blogging.

As you know from the title, this is a recipe for grilled pizza.  Before I made these, I’d never made any kind of pizza, but after seeing how awesome these came out I’ve been dreaming up many more pizza combos I’d love to try out.  I used the basic dough recipe from Gourmet Today, but obviously cooked it on the grill instead of the oven, and while I’d describe it more as “flatbready” I suppose, it was super-awesome.  I made 4 mini-pizza with 2 types of toppings- the first, a caramelized onion and mushroom pizza was amazing, and the second, a BLT pizza was just as good, but more of a summery pizza.  The caramelized onion and mushroom I’d consider a year-round pizza.  Both were incredible.

Basic Pizza Dough

Ingredients:
1 (1/4-ounce) package (2 1/4 tsp) active dry yeast
About 1 3/4 cups unbleached all-purpose flour, plus more for kneading and dredging
3/4 cup warm water (105-115 degrees)
1 1/2 tsp salt
1 1/2 tsp olive oil
Directions:
1. In a measuring cup, stir together the yeast, 1 tbsp flour, and 1/4 cup warm water.  Let sit about 5 minutes, until the surface appears creamy- if this doesn’t happen, discard and try again with new yeast.)
2. In a large bowl, mix together 1 1/4 cup flour and salt.  Add the yeast mixture, olive oil, and remaining 1/2 cup warm water.  Stir until smooth.  Stir in enough of the remaining 1/2 cup flour so that the dough comes away from the side of the bowl.  
3. Knead the dough on a lightly floured surface, with lightly floured hands, for about 8 minutes, until the dough is smooth, soft and elastic.  If the surface, or your hands become sticky, add more flour.  Form the kneaded dough into a ball, place in a lightly floured large bowl, dust the dough with flour, and cover loosely with plastic wrap.  Leave to rise in a warm, draft free place for 1 1/4 hours, until the dough doubles its size.
4. Once the dough is risen, carefully dredge in flour to coat, and transfer to a lightly floured work surface.  **Do not punch the dough down**  
5. At this point, you can either make one large 14-inch pizza, or smaller individual ones- I made 4 mini-pizzas.  Either way, carefully hold the dough with the bottom surface touching your work surface, and move the dough around with both hands as if holding a steering wheel, letting the weight of the dough stretch into a round.  Once to your desired size, place the round on a lightly floured surface, and work the edges with your fingers to get it to the desired size.
6.  Once formed, your dough is ready to top, bake or grill, depending on which recipe you are using for toppings.
** To grill, heat grill to medium-high heat.  Oil the grates well!  Brush the pizzas with olive oil on each side.  Place on grill over indirect heat (not over the coals- they’ll burn fast!).   Cook about 3 minutes, covered, until the dough begins to have large bubbles on the surface, and the underside is cooked.  If you are going to be putting on a topping that will warm up/melt cheese, remove the dough round to a clean surface with the cooked side facing up, and place your cheese/toppings on.  Return to grill and cook, covered for 4-6 minutes, until the dough is cooked, and the toppings/cheese are ready.  If you are putting a topping on that does not need to be cooked (like the BLT pizza), just flip the dough round over, and cook, covered for about 4 minutes.**  (Grilled pizza instructions adapted from Annie’s Eats)
Notes:
  • You can leave the dough to rise up to a day, covered and refridgerated.  Bring it to room temperature before you shape it.
  • After rising, the dough can be frozen up to 1 month.  Thaw and bring to room temperature before shaping.
  • My pizzas were definitely not round, but they were still tasty- this is a recipe where only practice will make perfect!
  • Watch your dough closely, as it can burn quickly.  My pizzas had a little char to them, but the smokiness just added some more delicious flavor.  Too much though, and it would probably overwhelm.

Mushroom and Caramelized Onion Pizza
Makes one 14-inch pizza, or 4 individual pizzas

Ingredients:
5 Tbsp extra-virgin olive oil
1 pound yellow onions, halved lengthwise and thinly sliced lengthwise
Salt and freshly ground black pepper
1 pound white mushrooms, or mixed wild mushrooms (such as shitake, cremini and oyster), trimmed if   necessary and sliced
1 tsp red wine vinegar
2 3/4 cups coarsely grated Swiss Emmental cheese, or Gruyere (about 8 ounces)
1/2 cup finely grated Parmigiano-Reggiano
1 tbsp fresh thyme leaves
Basic Pizza Dough (recipe above)
Directions:
1. In a 12-inch heavy skillet heat 3 tbsp olive oil over medium heat until hot but not smoking.  Add the onions, 1/4 tsp salt, and 1/8 tsp pepper.  Cover directly with a round of parchment paper.  Cook until the onions are softened and golden brown, stirring occasionally, about 18-20 minutes.  Transfer the onions to a bowl.
2. To the same skillet, add the remaining 2 tbsp olive oil, and heat until hot but not smoking.  Add the mushrooms, 1/2 tsp salt, 1/4 tsp pepper, and red wine vinegar, and cook about 8-10 minutes, stirring occasionally, until the mushrooms are browned and any liquid is evaporated.  Remove the mushrooms from the heat. 
3. Cook one side of your pizza dough on a grill preheated over medium high heat (as detailed above).  When done, remove to a clean surface.  Top the cooked side of the dough with the Emmental or gruyere cheese.  Scatter onions and mushrooms on top, and sprinkle with Parmesan.  
4. Place back on the grill over indirect heat, and cook, covered, 4-6 minutes, until the dough is cooked, and the cheese is melted.  Sprinkle with fresh thyme.
Notes:
  • The original recipe calls for Swiss Emmental cheese, but I had some gruyere left over so I used that instead, and it turned out wonderful.  Any type of Swiss cheese would probably do just fine, depending on how strong or mild you like it. 
  • I omitted the thyme because I thought I had some, but when I went to make the pizzas realized I didn’t, but I didn’t miss it at all.  I’m sure it would’ve been good, but I don’t think it’s necessary.
  • I halved this recipe to make 2 individual pizzas.

BLT Pizza
from Annie’s Eats, dressing from Annie’s Eats and Alton Brown via foodnetwork.com
Makes 4 individual pizzas

Ingredients:
Basic pizza dough (recipe above)

For salad topping:
4 cups green leaf lettuce, or mixed greens
1 tomato, seeded and diced
1/2 small red onion, thinly sliced
4 slices bacon, cooked and crumbled (drippings from cooking reserved for dressing)
1/2 cup crumbled feta cheese
For bacon vinaigrette:
1 1/2 tbsp extra virgin olive oil
2 tbsp cider vinegar
1 tbsp bacon drippings
1 1/2 tsp brown sugar (preferably dark)
1 1/2 tsp dijon mustard
1/4 tsp salt
1/2 tsp freshly ground pepper
Directions:
1. Combine the ingredients for the bacon vinaigrette in a small bowl, or salad dressing bottle, and whisk (or use handy emulsification device) to combine.
2. Combine the lettuce, tomato and onion in a large bowl, and toss to combine.  Add 1/4 cup of dressing to the salad, and toss gently to coat.  Add the bacon and feta to the salad, and toss gently to combine.
3. Make your grilled pizzas (recipe above), cooking both sides.  Top your cooked pizza dough with some of the salad mixture, and serve!
Notes:
  • This salad is great on it’s own, so if you don’t want to make pizza, or if there is leftover, eat it plain!
  • You can also use the vinaigrette to dress any salad…. In Alton Brown’s original recipe he uses basically double the amount, and tops 2 quartered heads of radicchio.  For quantities for his recipe go here!
  • This is one of the most refreshing summery pizzas I’ve ever had, and although topping a pizza with salad may seem a bit unusual, I can’t wait to make some other summery salad pizzas.
    Turkey Burgers with Cheddar and Smoky Aioli

    Now that it’s unofficially summer, and I have a working outside grill, it seems the perfect time to start exploring the wonderful world of burgers.  Growing up, I admit that burgers were not my favorite meal in the world…. sorry mom and dad.  I have changed my opinion though now that I’m older, and have realized the burgers don’t just have to mean a ground beef patty on a bun with ketchup and mustard.  I like the kicked up burgers with interesting toppings and lots of cheese far more than the plain burgers, and nowadays they are actually something I crave.  I am personally more a fan of turkey burgers, rather than beef, and so I decided that my first burger of the season would be one made with ground turkey.  After doing a little searching, I came upon a recipe for a grilled turkey burger with cheddar cheese and smoky aioli that originally appeared in the August 2009 issue of Bon Appetit.  This burger is seriously one of the best I’ve ever made- the toppings are awesome- cheddar cheese, grilled peppers and onions, and to top it off a delicious cumin and coriander spiced aioli. Really awesome!

    Turkey Burgers with Cheddar and Smokey Aioli
    Serves 4


    Ingredients:
    1/2 tsp cumin seeds
    1/2 tsp coriander seeds
    1/2 cup mayonnaise
    2 tbsp extra-virgin olive oil, plus more for brushing veggies
    2 tsp fresh lemon juice
    1 1/2 tsp smoked paprika
    1 garlic clove, pressed
    1 pound ground turkey, preferably dark meat
    4 red onion slices, 1/3-inch thick
    1 large or 2 small red bell peppers, quartered
    4 slices cheddar or Monterey Jack cheese
    4 hamburger buns
    arugula

    Directions:
    1. Heat a small skillet over medium heat, and toast cumin and coriander seeds about 1 1/2 minutes, or until aromatic and slightly darker in color.  Shake skillet often to move seeds around while toasting.  Once toasted, grind spices in a spice grinder, or crush in a mortar with pestle.  In a small bowl, whisk together mayonnaise, 2 tbsp olive oil, lemon juice, garlic, paprika, and spices.  Taste, and season with salt and pepper.
    2. In a medium bowl gently mix turkey with 2 tbsp of the aioli (mayo mixture).  Make 4 3/4-inch patties with the turkey, and make a shallow indentation in the middle of each burger with your thumb.
    3. Prepare your grill (should be about medium-high heat).  Sprinkle your burgers with salt and pepper on each side.  Brush the onions and peppers with olive oil.
    4. Grill onions and peppers for about 4 minutes per side, until soft and charred.
    5. Grill burgers 5 minutes on one side, then flip and grill 4 minutes.  Place cheese on burgers, and grill a minute more.
    6. Assemble burgers with desired toppings- onions, peppers, arugula, and a nice dollop of aioli.

    Source: culinarycovers.com, originally from Bon Appetit, August 2009


    Notes:

    • I highly recommend using a grill basket for the veggies in this recipe.  I unfortunately do not have one yet, and about 1/2 my onions ended up falling into the hot coals- luckily I had sliced more that the recipe calls for, and so the survivors were enough.
    • I grilled the burger buns on the grill as well, so if you like toasted buns, place them on the grill while the burgers are cooking, checking them frequently.  Move them around a little too, if some are on a hot or less hot part of the grill, so that they are toasted evenly.
    • I used white meat ground turkey for my burgers and they turned out perfectly fine, and not too dry, but the darker meat will turn out a juicier burger.  Dark meat is harder to find though- it’s not carried at the Shop and Stop I go to, but is carried at Whole Foods.
    • The aioli this makes was the best part in my opinion, and you’ll probably have some left over after you put it on your burgers.  It makes a great dipping sauce for fries, so I’d say that’s a good way to use any extra.

    Jicama Slaw

    I absolutely love trying new foods- especially vegetables/fruits.  My ideal weekly trip to the grocery store would involve buying something I’ve never tried before every single time.  I’m putting that into practice starting this week, and so my excursion to the store today lead me straight to jicama.  For those of you who who have not consulted the all-knowing wikipedia and have never had a jicama (aka Mexican turnip), this is a sweet and starchy tuberous root, with a crisp texture that is somewhat like a less-sweet apple combined with that of raw green beans. (I guess I can’t argue with that, although it reminded me of something else that I can’t quite place my finger on yet.)  I thought the best way to experience this to start would be in a really simple preparation, and I found one in Great Food Fast, which as you may have noticed is one of my goto cookbooks.  In it jicama is paired with just a few ingredients, and is super simple to put together, especially if you have a mandoline or something that can julienne your jicama for you, rather than doing it by hand.

    Jicama Slaw
    Serves 4


    Ingredients:
    1 medium jicama (1-1 1/2 pounds), peeled and julienned
    1/2 small red onion, or about 1/3 med-large red onion, halved and thinly sliced
    1/4 cup cilantro, coarsely chopped
    2-3 tbsp fresh lime juice (from 1-2 limes)
    Coarse salt and pepper

    Directions:
    1.  Combine jicama, onion, cilantro, lime juice, salt and pepper.  Toss and serve, or refrigerate until serving.
    2. Yep, it’s that easy 🙂

    Source: Everyday Food: Great Food Fast


    Notes:

    • The recipe says to serve immediately, or cover and refrigerate up to 6 hours.  What happens after 6 hours?  I don’t know, but I’ll find out soon because I didn’t eat this all, and I plan to have some tomorrow.  I’ll let you know the results of this daring experiment soon!
    • The onion is kind of strong in this, but I love red onion.  Just beware though that it can have an adverse effect on your breath.  Consider this your warning.
    • I enjoyed this simple preparation of jicama, but next time I’m ready for more- traditionally it is paired with chili powder, so I think I’ll incorporate that into my next jicama outing.